Anna Wheaton - Independent Stampin' Up! ®
Demonstrator, Burleigh Waters, Q, AUSTRALIA
Phone 07 55 765 469 Email: wheatonanna@hotmail.com Blog: http://www.nudgeink.blogspot.com/


December 23, 2011

A Christmas Surprise

Remember our various Cards For Troops initiatives throughout the year?  Our 200 cards were sent off under the name of "Lorikeet Stampers".  Yesterday I received a letter from Afghanistan thanking us for our efforts.  What a wonderful surprise!


Thanks to all the ladies who contributed homemade cards to this cause.  Let's do it again next year.

I hope we all take a moment at Christmas to remember our Australian soldiers who are serving overseas and cannot be with their families at this special time.  A few homemade cards is the least we can do to show them we are thankful!

Can I take this opportunity to wish everyone a Merry Christmas and a Happy New Year.  Thanks so much for your interest and encouragement throughout 2011.

Anna


December 16, 2011

Soft and Subtle Baby

I have been making some sample cards for my upline and the latest batch have been some baby cards using the Nursery Nest product suite on page 52 of the catalogue.  I thought I would sneak one of the cards onto my blog.


I still have trouble putting my Aviary birds into the cages. 

Need some inspiration?  The samples in the catalogue are perfect and you'll find co-ordinating DSP to go with the stamp set.   I bought the set last year.  Who'd have thought to use it for baby cards?

Have you spotted the new glimmer paper in the Summer Mini?  It comes in red and silver and is so beautifully sparkly.  It's easy to punch from and it doesn't 'shed' glitter as you use it.
I've used it on the tag detail here.


If you would like to order anything from Stampin' Up! please give me a call on 55 765 469 or email me at wheatonanna@hotmail.com

Thanks for stopping by!

Stamps:  Tiny Tags, Aviary
Card:  Blushing Bride A4, Perfect Plum A4, Whisper White A4, Nursery Nest DSP, Silver Glimmer Paper
Ink:  Blushing Bride, Basic Grey, Perfect Plum, Pear Pizzazz
Tools:  Big Shot, Polka Dot TEF, Perfect Pennant Bigz L Die, Jewellery Tag Punch
Accessories:  Whisper White 1 cm Taffeta Ribbon

December 14, 2011

Petal Cone Christmas

Our last class for the year was Christmas boxes and one of the projects was this Christmas cone, using the Petal Cone die.  It is so very easy to put together and the scallop detail under the petals is an elegant touch.


We added a Christmas flower to the front using the Fun Flowers die. I have had Shimmer paint on my table for ages and had read about mixing it with rubbing alcohol to make a spray.  So we tried it on our flowers.  See the shimmer?  It was a beautiful Christmasy touch!  (Looks even better in real life.)


I am using my cones for presents for two little friends of mine.  The pressie is under the shredded paper and must remain a secret.  But did you spot the little box in the top?


I saw the idea for these on Mary Fish's blog.  They are made using the Petal Card Double Punch.  Four of these shapes punched out and glued together make the cutest little box you'll ever see.  The images come from Jolly Bingo Bits and are cut out using the new 1" punch from the new Summer Mini.  Two Dove chocolates fit perfectly inside.
The Jolly Bongo Bits set has every Christmas image imaginable and I can see me using it a lot in Christmases to come.

If you are interested in coming to my classes, they are held in the Burleigh Waters area.  Phone me on 55 765 469 or email me at wheatonanna@hotmail.com

Thanks for stopping by!

Petal Cone Gift
Stamps:  none
Card:  Cherry Cobbler and Old Olive A4
Ink:  Shimmer Paint
Tools:  Big Shot!, Petal Cone Bigz L Die, Fun Flowers Bigz L Die, Paper Piercer
Accessories:  6.4 mm Grosgrain Ribbon, Clear Rhinestone Brads

Teeny Box
Stamps:  Jolly Bingo Bits
Card:  Lucky Limeade A4, Whisper White A4
Ink:  Real Red
Tools:  Petal Card Double Punch, 1" Square Punch
Accessories:  3.2 mm Real Red Taffeta Ribbon, Jingle Bells (non SU!)

December 11, 2011

Library Classes

I have recently done some classes at the local libraries to introduce ladies and one gentleman to cardmaking.  I kept the designs simple as I knew some would not have made cards before.  I have blogged similar designs before but thought this was a good 'set'.


I found my daisy card holder at Myer.

Thanks for stopping by!

Anna

December 7, 2011

Happy Graduation

Maisie, the daughter of a customer and friend is finishing primary school this week.  I remember those mixed feelings of excitement and sadness.  I made her this card to wish her luck.


The owl is dressed for the occasion again!  Does he ever get it wrong?


Stamps:  Medallion, Teeny Tiny Sentiments
Card:  Only Orange, Yoyo Yellow, Kaleidoscope DSP (all retired)
Ink:  Only Orange
Tools:  Owl Builder Punch,  Jewellery Tag Punch, 6.4cm Circle Punch
Accessories: Mini Brads

I apologise for the blue background.  My son has been using my camera and has changed some settings somehow!


December 5, 2011

Not a card

I know it's a bit unusual to post a pic of a pair of scissors.


Anyone who comes to my classes knows that these are my scissors.  They are the scissors that are passed around when some extra cutting power is needed.  They are the scissors that cut ribbon when no other scissors will.  They are Stampin' Up!s Craft and Rubber scissors...and they are mine.
BUT you too could own a pair of scissors just like these as they are just one of the items reduced in our December Frenzy.  They are 30% off, so instead of paying $37.95, you pay $26.57.
If you have been wishing for a pair of scissors like mine...if you would like my scissors to be your scissors, contact me to place an order.

Thanks for stopping by!

Anna

December 4, 2011

December Frenzy


It's that time of the year to save on selected stamps and accessories. Click on the link to the left for a closer look at our December specials.


December 2, 2011

Christmas Frame

I am really excited to show you this project for two reasons.  One:  I actually finished it before Christmas and Two:  it turned out exactly as I wanted it to.  You know how sometimes you have an idea in your mind of how something should look and the end product is nothing like it?  Well, this finished up just right.  I saw the idea on Nancy Riley's blog a year ago.  Have a look at her version by clicking HERE (but finish looking at mine first!)

Here it is...  It looks even better in real life and there's bling here and there to give it Christmas sparkle.


I took the glass out of the frame for the photos.  Scroll down for some close ups.  Love the Very Vanilla bird against the Cherry Cobbler.


This stamp set of the Nativity scene is a favourite for me this Christmas. 


Cherry Cobbler Seam Binding ribbon adds a touch of softness on the wreath.


I have used a Glimmer Brad for the centre of this flower.  The 3D Christmas tree is made using the Pennant Parade stamp set.


Sadly our star punch punches have retired.  The flower is made using the Doily Triple layer punch.


We can't forget Rudolph, made using the Owl Builder Punch.


And, of course, the owl himself, dressed in his Christmas waistcoat.


I had a great day today, running a free cardmaking class at the local library.  Some of the ladies had never made cards before and all of them did a fantastic job.  If you are one of those ladies popping in to see my blog, welcome! And do pop in again!

Thanks for stopping by!

Anna

November 26, 2011

Santa Tag tutorial

This week's class was Christmas tags.  We made a mix of styles including some for Santa fans.  I have seen many variations of this design on the net so here is my version.


Isn't he cute?  Want to know how to make him?  I'll do my best to show you....Scroll on down.

I started with a 7cm by 7cm square of Real Red card stock and a quarter of a sheet of Whisper White A4 which I had run through the Big Shot using the Polka Dot TEF.

Then I gathered these punches:  the Ornament Punch, the Bird Builder Punch, the 4.4 cm Circle Punch, the Extra-Large Oval Punch, and a school punch (I think everyone has one of these to punch holes for ring binders). Also used, but not in the photo was the 1.3 cm cirlce punch.


First punch a 4.4 cm circle out of a light coloured card (I used Blush Blossom, but it is now retired). Snail this onto your Real Red cardstock, slightly higher than halfway.


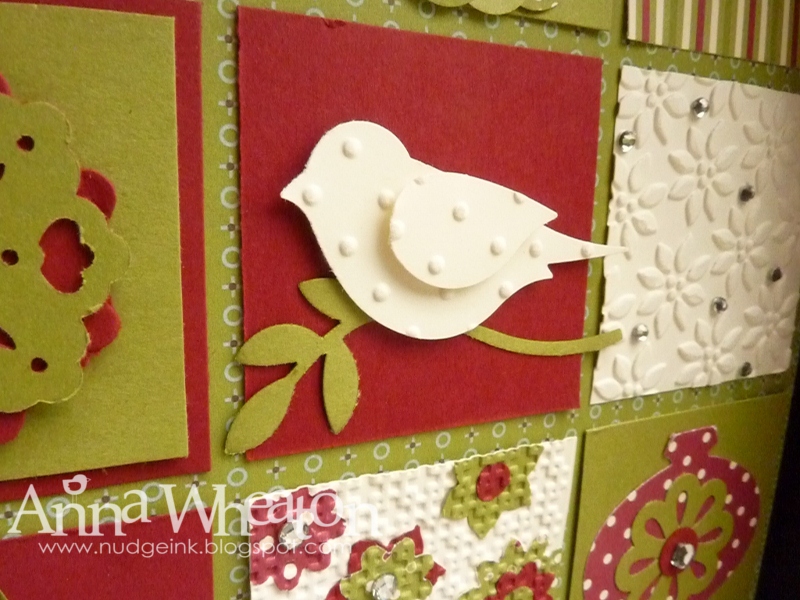
Punch an Ornament Punch from your Polka Dot Whisper White and snip off the top.  Snail this (gently, so you don't squash the dots) onto your circle. (I've left the top of the ornament there to show you what to snip.)


So you'll end up with this.


Using the Bird Builder Punch, punch out one wing from your Polka Dots then turn the card stock over to punch another wing.

One wing with the cardstock this way (bumps upwards)...


And then one with the cardstock this way (bumps downwards)


These are your two moustache pieces.  A dimensional will fit on the back of each one to give the face a bit of depth.  The nose is out with the 1.3 cm Circle Punch (which I left out of my punch picture!)  It's also attached with a dimensional...because noses stick out a little don't they?  His eyes are punched out of Basic Black using a school/binder punch and stuck on with a 2-Way Glue Pen.


His hat is made using the Extra Large Oval.  First, punch and take a chunk out of your Whisper White Polka Dots.
You don't need the bit you just punched out but you need the curve it has left behind.


Move your punch up to take a 'bite' out, so that you have a piece with two curved edges.  Don't make it too skinny- Santa's hat need to be warm and woolly.


Punch out a pom pom from the Whisper White Polka Dot, using the 1.3 cm circle punch.


Attach the hat and the pom pom to your tag, again using dimensionals.  I find it looks best if your pom pom is attached to meet the pointy part at the side of the hat.


 So there he is.  If you don't have the exact punches experiment a bit with the shapes that you do have.


We made a whole lot of different tags in the class and learnt a few new ideas.  If you are interested in coming along to my classes, they are held twice a month in my home in the Burleigh Waters area.  Email me at wheatonanna@hotmail.com or phone 55 765 469.

Thanks for stopping by!
Anna

November 24, 2011

Christmas Thankyou

I have been very busy lately, preparing for classes tomorrow and also filling Christmas card orders.  I am wondering if I'll get time to make my own!  Maybe next week.

I made this pressie for Zac's piano teacher.  We had been given a tin of delicious choccies, which we had finished, but I kept the tin because of its unusual shape.
.


A bit of DSP and some ribbon go a long way to dress it up.


And on top, a flower made with the Scallop Circle Punch.  And I filed it with....delicious choccies.


I also made some gift tags in a co-ordinating pack.


Thanks for stopping by!

Anna

November 18, 2011

Treat Sticks

That's the name I have given these anyway.  I have had a teacher order a whole bunch of these for the kids in her form class.  The skinny bags are from ebay.  The sweets are Christmas M&Ms.


I wonder how long they'll last once they are handed over.


Thanks for stopping by!

Anna

November 15, 2011

Two Tags die and a Reindeer

As I have said before, I love the Two Tags die.  It's a Stampin' Up! exclusive and it is so quick and easy.  Here it is layered with a cute reindeer made from the owl punch (cut the legs off). 


The antlers are made with one of our new Sizzlits dies - Swirls Scribbles.  I love that the reindeer have quite different expressions because of where I placed the nose.

I have not posted a recipe for a project for awhile so here it is...

Card:  Crumb Cake, Real Red, Whisper White
Tools:  Big Shot, Scallop Circle Punch, Two Step Owl Punch, Swirls Scribbles Sizzlit die, Two Tags die

Thanks for visiting!

Anna

November 13, 2011

Christmas Card Class

In my last post I showed you one of the cards we made in our Stamp-a-Stack.  Here are the other two!  Sadly, this a la carte stamp set has retired but I still love getting it out of the drawer for Christmas.
This design was inspired by Robin Merriman.  I love to make some cards that are not traditional Christmas colours.


Our other card uses the Stitched Stocking Stamp Set and its co-ordinating punch.


The little pressies in the top of the stocking are from the Loads of Love Accessories set.

Thanks for stopping by.

Anna

November 11, 2011

Swappin'

Regional Training was last Saturday where we are given heaps of creative and business ideas.  Demonstrators can make swaps for one another - make 20 cards the same, swap with others and you end up with 20 new ideas.  Just prior to Regionals, we also did a team swap, so I've ended up with a really inspiring collection of cards.


There are so many different ideas and it's great to get straight in and try some out.  When we did our team swap, Liz Collett  my upline, gave me this card.


I love its simple lines and two colour combination.

At regionals, she gave me this card.  Same layout but a very different result.


So for my recent Christmas Stamp-a-Stack, we made this card, an adaptation of Liz's idea.


Three cards, same basic layout yet three different results. 

Don't forget that the Ideas Book and Catalogue is packed full of great card designs which you can adapt to the stamp sets that you have.  If you don't have a catalogue, contact me and I will get one to you.  Or receive one free if you book a party.

Thanks for stopping by!


November 10, 2011

Easy Owl

I mentioned in a previous post that I am making some cards for a school social club.  Here is one made using the owl punch and the DSP Paper Patterns Stack which made it so easy to put together a co-ordinated card.


The sentiment was computer generated.


November 1, 2011

Big Shot is Hot in November

Throughout November Stampin' Up! is offering a 10% discount on a wide range of Big Shot accessories. Now is the time to purchase that favourite die or folder that's been on your wish list.

Don't have a Big Shot yet?  SU! is offering 10% off a Big Shot Bundle
  • The Big Shot machine
  • The Scalloped Heart of Hearts Embosslits die and
  • The Manhattan Flower Textured Impressions Embossing Folder
These three items would normally cost $186.85 but with your 10% off you pay $168.16. (That's getting the Embossing Folder for free! plus some change.)

For a full list of the items that are 10% off click here or on the blinkie on my left side bar.

October 31, 2011

Fabric Envelope

Our last class project was to create this lovely fabric envelope with the Scallop Envelope die.


See how the fabric matches the stamp?  Beoootiful!

And a close up - we glued the fabric to the cardstock, cut it out with the Scallop Envelope die, then ran it through again, inside an embossing folder.


Stamps:  Elements of Style
Card:  Cajun Craze, Whisper White
Ink:  Marina Mist
Tools:  Big Shot, Scallop Envelope Bigz Die, Vintage Wallpaper TEF
Accessories:  Beau Chateau Fabric

October 30, 2011

Big Shot and Fabric

My most recent class was using the Big Shot and Fabric. Demonstrators were shown some excellent ideas at Convention of how to combine fabric with all the beautiful dies and embossing folders.

Our first project was using felt with the Blossom Party die glued onto the Top Note die to make a beautiful gift tag.  The ladies came up with some stunning colour combinations.


Card:  Whisper White. Old Olive
Tools:  Big Shot, Blossom Party die
Accessories:  Felt (non SU!)

I dug out some Christmas material from my cupboard which we cut out with the Fun Flowers die to make a Christmas brooch and a fabric focussed card.


Card:  Garden Green, Real Red, Basic Black, Crumb Cake
Tools:  Big Shot, Fun Flowers Bigz L die
Accessories:  Christmas Material (non SU!)

Our other two projects used the beautiful SU! fabric which co-ordinates with the colours and stamps.  This butterfly card uses the Beau Chateau fabric.


Card:  Pink Pirouette, Soft Suede
Tools:  Big Shot, Beautiful Butterflies Bigz die, Polka Dot TEF, Elegant Lines TEF
Accessories:  Chantilly Crochet Trim, Filigree Designer Brads, Beau Chateau Fabric

I'll put the last project in a separate post to follow.

Thanks for stopping by!

Anna