Anna Wheaton - Independent Stampin' Up! ®
Demonstrator, Burleigh Waters, Q, AUSTRALIA
Phone 07 55 765 469 Email: wheatonanna@hotmail.com Blog: http://www.nudgeink.blogspot.com/


February 11, 2015

I don't think you've bought that Thinlit yet...?

So remember I said there's this thinlit you need?  Remember?  The Mini Treat Bag thinlit?


Here it is again.  One thing I don't really need is more of the brown paper that Stampin' Up! uses to pad out our boxes  But it keeps coming, so I try to put it to good use.

These bags are made using that very brown paper!  Nope!  Didn't even iron it!

Inside is a card cut to size, and finished with some washi tape.

 
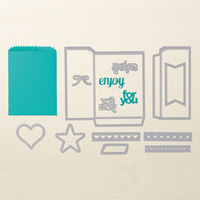
For the embellishments on the outside I used strips of washi on Whisper White then cut them out using the various shapes from the Mini Treat Bag set.  Not bad hey?


Stampin' Up! has some fabulous videos about its products.  Check out the one below.  I have had customers tell me that the videos can't always be viewed on the ipad - I am not sure why, so if you have a laptop, try that.


Thanks for stopping by!

Anna


Table built using Product Table Builder by The Crafty Owl - Independent Stampin' Up! Demonstrator.

February 9, 2015

So There's This Thinlit You Need

My favourite Big Shot accessory from the Occasions Catalogue is the Mini Treat Bag Thinlit.  I didn't realize I needed it till I got it, so I thought I would give you the heads up....You know...save you losing sleep any longer. 

 
The die makes the cutest little paper bags which I have shown you some of already.  But the even better part is, it has all sorts of other dies with it.  See the star? The 'For You'? The row of stars? These are just some of the extras in the set.


I found this design on Pinterest and followed its trail to Darlene McCallum.  These are so bright and fun using the DSP paper stacks and I used Silver Glimmer Paper for the 'For You'.
 
So you see?  You need it!  Go on...order it.  You are welcome!
 
Thanks so much for stopping by!  Don't forget Sale-a-Bration means that if you order $90 worth of product you get to choose a SAB item for FREE.
 
Product details below!
 
Anna
 
 
Table built using Product Table Builder by The Crafty Owl - Independent Stampin' Up! Demonstrator.


February 6, 2015

More Party Time

Here's the last of the Party Time projects I presented.  I love the leaf veins in the Build a Bouquet stamp set.  There are three of them in the set of different sizes.  They are designed to stamp on the leaves that are part of the Build a Bouquet set but I have some other ideas....


I used the small and medium veins to create this Christmas wreath.  (Punch out a circle and adhere it to the front of your card as a guide to stamp around.)  Simple but effective.
 

And the largest vein stamp does double duty for this cute reindeer.  Yup - that's the owl punch!


Thanks for stopping by!  Don't forget that it is Sale-a-Bration time so with any and every $90 spent you receive a Sale-a-Bration item for FREE.
 
Product details below.  Click on the products to visit my online store or email me at wheatonanna@hotmail.com to place an order.
 
Table built using Product Table Builder by The Crafty Owl - Independent Stampin' Up! Demonstrator.

February 4, 2015

Party Time Projects

In my last post, I mentioned that I got to present at Party Time in Brisbane.

I wanted to remind everyone that we don't need to get too complicated with our projects and that there is magic in just stamping.

My card were made using the Whisper White notecards and envelopes.  These are great value at only 50 cents each, envelope included.
 
I had a Whisper White panel slightly smaller than the card front for stamping on.  The middle was covered with an oval cut using the Oval Framelits and post it notes.  First up I stamped using Daffodil Delight ink.
 
 
Then I stamped the same image using Pumpkin Pie ink and then Real Red.  Keep rotating the stamp so that the image faces different directions and make sure you go off the edges of the cardstock.
 

I also added some greenery using the leaf 'vein' stamp from the set.  When the post it note is peeled away, it leaves a lovely oval frame for the sentiment.


See?  Simple but magical.
 
I also showed a bunch of other cards using the Build  Bouquet stamp set and the Whisper White notecards.  Be prepared to scroll!
 
Another version of masking, creating a rectangular frame:
 

The photopolymer stamps make it super easy to line things up.


See how for each one I made a stamped matching envelope liner?


Thanks for stopping by!
 
Product details below.  Click on the products to visit my online store or email me at wheatonanna@hotmail.com to place an order.
 
Anna
 
Table built using Product Table Builder by The Crafty Owl - Independent Stampin' Up! Demonstrator.