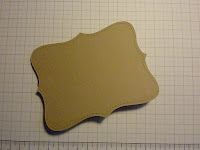
You need a Mini Lunch Sack and two Top Note die cutouts.
Cut three inches (7.5 cm) off the bottom of the bag. In my class I made the mistake of telling everyone to cut three inches off the top...it makes a difference.
Carefully remove the cardboard base from inside the bag and set it aside. Snail one side of the bag.
Adhere this to a Top Note, cut out using the Big Shot. (Mine is cut out in Crumb cake)
Fold the base of the bag down so that the other side of the bag is flattened and exposed. Snail this side of the bag.
Adhere the other Top Note on top, lining it up with the first.
Carefull move the sides of the bag so that they stick out, allowing you to move your oval punch into place to punch out a handle. Bring the two sides together and punch through the first handle hole to make the second one.
Reform the shape of the Mini Lunch Sack and decorate as desired. If using straight away, snail the insert that you removed earlier back into place. Otherwise, the bag can be folded and stored flat and the insert replaced later.
 In my next post I'll show you how to make the flower.


No comments:
Post a Comment